Building Durable Wooden Picture Frames for Large Artwork

Building Durable Wooden Picture Frames for Large Artwork

Creating a picture frame for a large piece of artwork presents unique challenges. The sheer size demands robust construction to prevent warping, sagging, and ultimately, damage to your precious artwork. This article guides you through building a durable wooden frame capable of supporting even the most substantial canvases or prints, ensuring your masterpiece remains beautifully displayed for years to come.

Choosing Your Wood and Tools

The foundation of a strong frame lies in the quality of the wood. Hardwoods like oak, maple, or cherry offer superior strength and durability, resisting warping better than softer woods like pine. Consider the weight of your artwork; heavier pieces require a thicker frame. Aim for wood with minimal knots or imperfections to ensure consistent strength. Gather your tools before starting: a miter saw (or a hand saw and miter box for ultimate precision), wood glue, clamps (lots of them!), sandpaper (various grits), wood finish (stain, varnish, or polyurethane), a measuring tape, and a pencil. Don't forget safety glasses and ear protection!

Preparing Your Wood

Before cutting, carefully measure your artwork to determine the frame's inside dimensions. Add your desired frame width to each measurement to calculate the total frame size. For extra strength, particularly with larger frames, consider using wood that's at least 1.5 inches wide and 1 inch thick. Cut your wood pieces to the calculated lengths using a miter saw at a precise 45-degree angle. Accuracy here is critical; slight imperfections will be amplified in a larger frame. Check your cuts carefully, and make any necessary adjustments.

Assembling the Frame

Apply a generous bead of high-quality wood glue to the mitered ends of each piece of wood. Carefully join the pieces, ensuring the corners are perfectly aligned. Secure the joints firmly with clamps, applying even pressure to prevent gaps and ensure a tight bond. Let the glue dry completely according to the manufacturer's instructions; this is crucial for a strong, long-lasting frame. Remember, pressure is your friend! The more clamps you use, the better the bond will be, especially with the weight of a large frame.

Reinforcing the Joints

For added strength and longevity, consider reinforcing the mitered corners with small wooden blocks, often called splines or biscuits, inserted into the joints before applying glue. These small pieces of wood add significant strength and prevent the frame from separating over time. Alternatively, you can use corner braces, either metal or wood, for additional support. These are especially beneficial for large frames that will hold considerable weight.

Finishing Your Masterpiece

Once the glue is completely dry and the clamps are removed, sand the frame smoothly, starting with coarser grits and gradually moving to finer grits to achieve a polished finish. Wipe away all sanding dust before applying your chosen finish. Two or three thin coats of a high-quality stain, varnish, or polyurethane will protect your frame from moisture and damage, extending its lifespan. Allow each coat to dry completely before applying the next.

Hanging Your Artwork

To complete the process, attach D-rings or sawtooth hangers to the back of the frame. The placement of these hangers should be carefully considered to ensure the frame hangs evenly and securely on the wall. The weight of a large framed artwork demands strong and reliable hanging hardware. Consider using multiple hanging points for extra security. Finally, carefully place your artwork inside the frame and admire your handiwork. You've successfully created a durable and beautiful frame to showcase your valuable artwork for many years to come!

Share:

Beginner-Friendly Woodworking Project Plans

Unlock Your Inner Craftsperson: Simple Woodworking Projects for Beginners

So, you're ready to dive into the rewarding world of woodworking, but the sheer volume of projects online feels overwhelming? Don't worry! This article will guide you through three beginner-friendly woodworking projects that require minimal tools and experience. We'll walk you through each step, ensuring you build confidence and create something beautiful along the way. Get ready to transform lumber into lovely creations!

Project 1: The Classic Coasters

Start your woodworking journey with a project that's both practical and aesthetically pleasing: coasters! These small projects require minimal tools and materials, making them ideal for first-timers. You'll learn fundamental skills like cutting, sanding, and finishing, setting a strong foundation for more complex projects later.

Materials You'll Need:

  • Small pieces of hardwood (maple, cherry, or walnut work well)
  • Sandpaper (various grits, from coarse to fine)
  • Wood glue
  • Wood stain or paint (optional)
  • Polyurethane sealant (optional)
  • Circular saw or hand saw
  • Measuring tape

Step-by-Step Instructions:

  1. Cut your hardwood into 4-inch squares. Use a ruler and pencil to carefully mark your cuts before sawing. Practice makes perfect!
  2. Sand each coaster thoroughly, starting with coarser sandpaper and gradually moving to finer grits, until you achieve a smooth surface. This step is crucial for a polished finish.
  3. Apply your chosen stain or paint, following the manufacturer's instructions. Let it dry completely.
  4. For added protection, apply a coat of polyurethane sealant. This will make your coasters more durable and easier to clean.

Congratulations! You've crafted your first woodworking masterpieces. Display them proudly and enjoy your newfound crafting skills.

Project 2: A Simple Shelf

Once you've mastered the coasters, it's time to tackle something a bit more substantial: a small shelf. This project will introduce you to more complex cuts and assembling techniques. By following these instructions carefully, you will build a useful and attractive addition to your home.

Materials You'll Need:

  • Two 1x6 boards (length determined by desired shelf size)
  • Two 1x4 boards (length equal to the width of your 1x6s)
  • Wood screws
  • Wood glue
  • Sandpaper
  • Drill with drill bits
  • Measuring tape
  • Level

Step-by-Step Instructions:

  1. Cut the 1x6 boards to your desired length. These will form the shelf's supports.
  2. Attach the 1x4 boards to the ends of the 1x6 boards using wood glue and screws, creating a sturdy base.
  3. Sand all surfaces for a smooth finish. Carefully sand the edges to remove any sharp corners.
  4. Mount the shelf securely to the wall using appropriate wall anchors. Remember to check your wall type to choose the correct anchors.

Your new shelf is ready! Perfect for displaying books, plants, or decorative items. Enjoy the sense of accomplishment and the functional beauty you have created.

Project 3: A Rustic Key Holder

This final project adds a touch of rustic charm to your home while providing a practical function. The key holder is another great project to practice your skills and create a personalized piece for your entryway.

Materials You'll Need:

  • A small piece of reclaimed wood or a rustic-looking plank
  • Hooks (enough for the number of keys you need)
  • Screws
  • Sandpaper
  • Wood stain or sealant (optional)
  • Drill
  • Measuring tape

Step-by-Step Instructions:

  1. Sand the wood to remove any splinters or rough edges. Embrace the imperfections of the wood; it adds to the rustic appeal!
  2. Mark where you will place your hooks. Ensure they are evenly spaced.
  3. Drill pilot holes for the hooks to prevent wood splitting.
  4. Attach the hooks using screws.
  5. Apply a wood stain or sealant to protect the wood (optional).

Hang your rustic key holder proudly. This simple project will not only keep your keys organized but also showcase your growing woodworking prowess. Remember, the most important thing is to have fun and enjoy the process of creation!

Share:

How to Build Simple Furniture for Your Home

Unlock Your Inner Carpenter: Building Simple Furniture for Your Home

Tired of mass-produced furniture that lacks character and personality? Yearning for a space that truly reflects your style? Then grab your tools and unleash your inner carpenter! Building simple furniture is a rewarding experience that allows you to create unique pieces tailored to your home and your budget. This guide will walk you through the process, empowering you to transform your living space one piece at a time.

Choosing Your First Project: Starting Small and Simple

Don't jump into building a complex armoire on your first attempt. Start with a small, manageable project that builds confidence and teaches fundamental woodworking techniques. A simple side table, a small bookshelf, or even a sturdy stool are excellent choices. These projects require fewer tools and less intricate joinery, allowing you to focus on mastering the basics. Research various plans online; many free plans are available for beginners. Pay close attention to the materials list and the step-by-step instructions. Choosing a design with clear diagrams and concise instructions is key to success.

Essential Tools for Beginners

Before you dive into your project, gather the necessary tools. You don't need a complete workshop to start. Begin with the essentials:

  • Measuring tape: Accuracy is paramount in woodworking.
  • Pencil: For marking cuts and assembly points.
  • Hand saw or circular saw: For cutting wood to size.
  • Screwdriver (Phillips and flathead): For fastening components.
  • Level: Ensures your furniture stands straight and true.
  • Safety glasses: Protect your eyes from flying debris.
  • Wood glue: A vital component for strong joints.
As you progress, you can gradually add more specialized tools to your collection. Remember, starting with a basic set allows you to focus on the construction process without being overwhelmed.

Selecting Your Materials: Wood Matters

The type of wood you choose significantly impacts the final product's look, durability, and workability. For your first project, opt for readily available and easy-to-work-with softwoods like pine or fir. These woods are less expensive, relatively forgiving, and easier to cut and shape, making them ideal for beginners. Always check the wood for knots and imperfections before purchasing. Remember to buy extra material to account for potential mistakes and allow for adjustments.

Cutting and Preparing the Wood

Precise cutting is crucial for a well-built piece of furniture. Carefully measure and mark your wood according to the project plans. Use a sharp saw to ensure clean, straight cuts. A poorly executed cut can compromise the structural integrity of your project and leave you frustrated. Take your time, measure twice, cut once! Remember to sand the edges of your wood pieces after cutting to remove any splinters and create a smoother finish. This step significantly enhances the overall quality and appearance of your furniture.

Assembly and Finishing Touches: Bringing it All Together

Following the instructions carefully, begin assembling your project. Take your time, double-check measurements, and ensure everything aligns correctly. Use wood glue liberally and clamp the pieces together to allow the glue to set properly. Once the glue is dry, use screws to further secure the joints. Don't rush this process; patience is key to a sturdy and well-built piece. Once the assembly is complete, sand the entire piece again to smooth out any rough edges and prepare it for finishing.

Finishing Your Creation

Finishing adds the final touch, protecting the wood and enhancing its appearance. Choose a finish that suits your style and the intended use of the furniture. Options include paint, stain, varnish, or a combination thereof. Apply the finish according to the manufacturer's instructions, allowing each coat to dry completely before applying the next. Once the finish is dry, admire your handiwork! You've successfully built your own piece of furniture, a testament to your creativity and newfound woodworking skills. Now, go forth and furnish your home with pride!

Share:

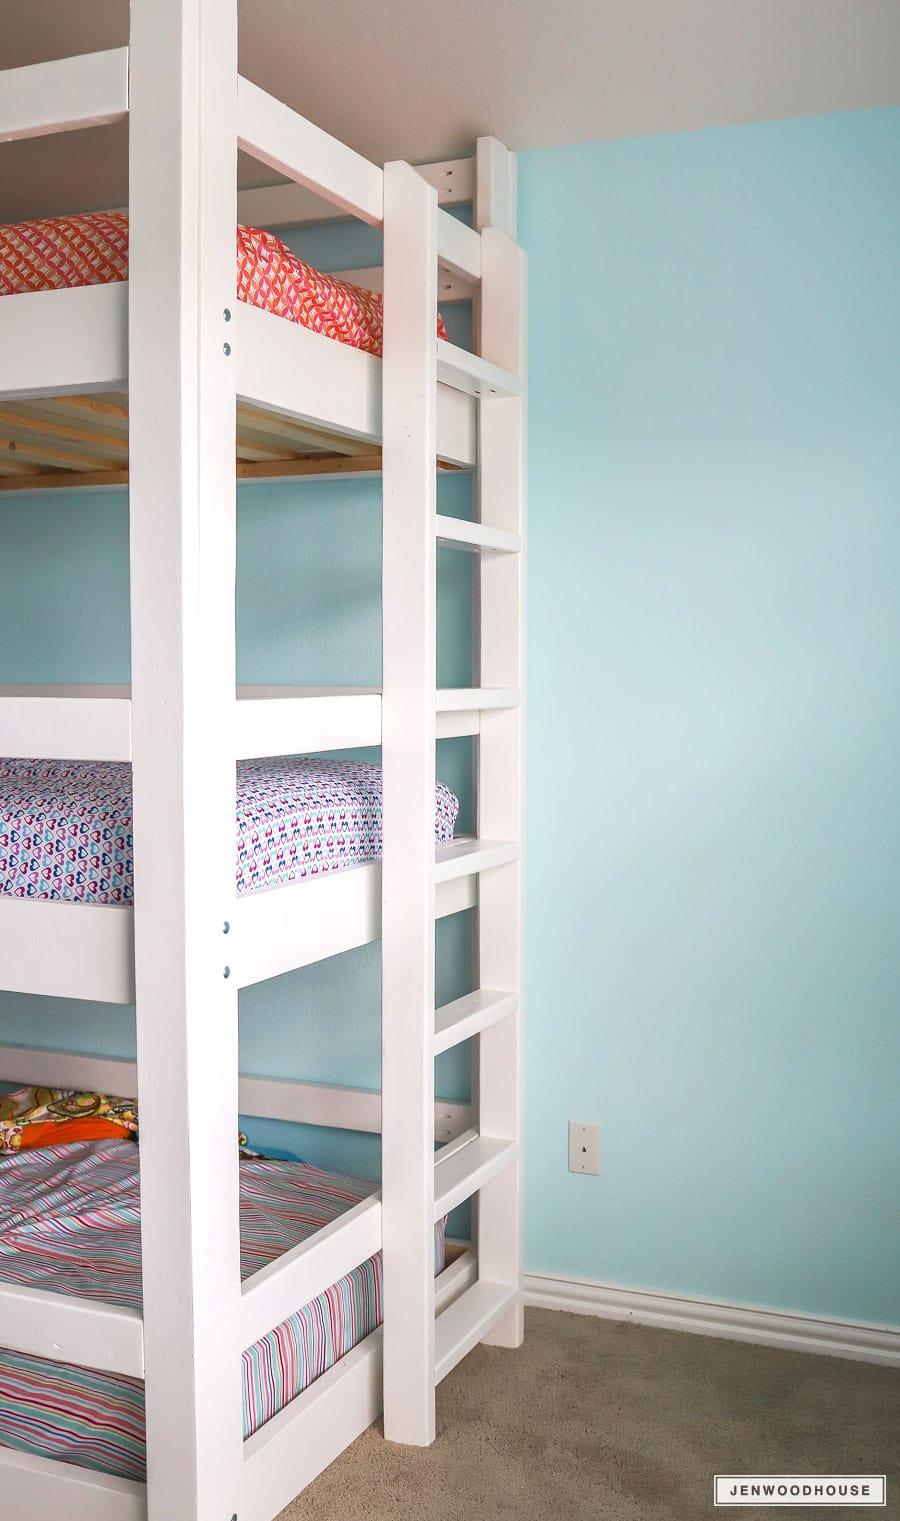
Triple bunk bed diy plans


Diy Triple Bunk Beds - WoodWorking Projects & Plans
Diy Triple Bunk Beds - WoodWorking Projects & Plans Ana White Triple Bunk inspired by the hanging day bed ...
Ana White Triple Bunk inspired by the hanging day bed ... How To Build A DIY Triple Bunk Bed - Plans and Tutorial!
How To Build A DIY Triple Bunk Bed - Plans and Tutorial! Fabulous DIY Kid Beds - The Scrap Shoppe
Fabulous DIY Kid Beds - The Scrap Shoppe

How To Build A DIY Triple Bunk Bed - Plans and Tutorial!

35+ free diy bunk bed plans save - tiny spaces living, Read plan › 4. diy triple bunk bed – bunk bed dimensions plans. complicated. dimensions , triple bunk bed plans enable maximum space. involves beds. cheaper buying prefabricated beds.. Triple bunk bed plans howtospecialist - build, This step step diy article triple bunk bed plans. building bunk bed cheap solution small rooms don’ provide space fitting regular beds. designs choose , article show making classic bulk bed common materials.. 44 bunk bed diy plans – cut wood, This bunk bed plan . , triple bunk bed mentioned. , bunk bed compared triple bunk beds. triple bunk bed kids, option ..


Share:

Dog house roof ideas


How waterproof dog house (step--step guide, Set the dog house on the new foundation. now, you can start working on sealing the roof and the walls of the dog house. step 2: seal the roof of the dog house. tar paper is a cheap and practical waterproofing solution. the material is obtained by impregnating paper or fiberglass mat with tar. to roof the dog house, affix a layer of tar paper. 16 free diy dog house plans build, This free dog house plan, named the sparky1, is a simple dog house that's made from inexpensive and recycled basic building materials. there are insulated floors, a removable roof, a cedar deck, and an optional inner wall. download the free dog house plan that includes drawings, a material list, and building instructions.. How build remarkable diy dog house: 21 free dog house, By the 1800s, it was common for individual family dogs to have their own doghouses, with the classic pitched roof dog house coming into vogue. 31 easy & charming diy picture frame ideas you'll want to try.

nantucket dormer architecture This is one of the first ...
Nantucket dormer architecture This is one of the first ... dogtrot style And a 3D rendering with, and without a ...
Dogtrot style And a 3D rendering with, and without a ... Inspirations: Small Air Circulation Ideas With Eave Vents ...
Inspirations: Small Air Circulation Ideas With Eave Vents ... House Designs with Rooftop Terrace Rooftop House Design ...
House Designs with Rooftop Terrace Rooftop House Design ...

Inspirations: Small Air Circulation Ideas With Eave Vents ...

Dog house roof design - design ideas, How increase volume dog house roof design. buy levitra purpose dog house roof design shape exploit vaulted roof. vaulted roofs add volume space, reason numerous advanced house designs roof design exploit vaulted roofs – space.. Dog house ideas - home depot, This home depot guide dog house ideas inspiration find dog house pet. find comfortable dog house furry friend. roof-top sun deck perfect place dog lounge sun watchful eye kingdom. sun bright, ’ plenty shady space curl. Make dyi dog kennel roof cover 2020 diy dog, Apr 24, 2020 - hard find hardware simple roof dog kennel. cost cheap dog kennel roof cover solution. dog kennel roof ideas.


Share:

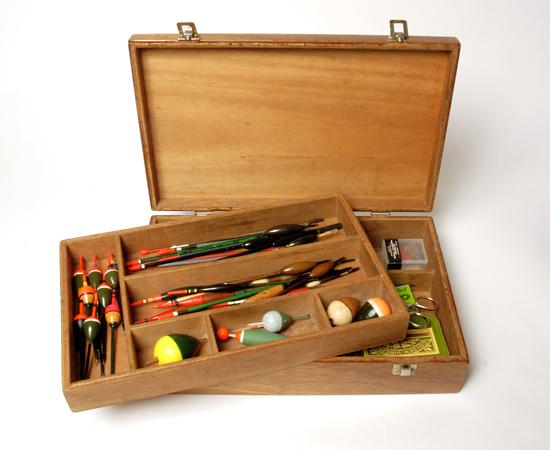
Wooden tackle box designs


Wooden tackle box products sale ebay, Get the best deals on wooden tackle box when you shop the largest online selection at ebay.com. free shipping on many items browse your favorite brands affordable prices.. Free woodcrafting plans., Small furniture designs (book# 4556), 40 fine tables (book# 4557), all, wood box bag handles beach shoes, wooden bird feeder bird feeding station bird house, four bird house, 24 room martin house tackle box teeter totter toy aircraft carrier toy bus toy car with removable roof.

Custom Wood Fishing Tackle Boxes
Custom Wood Fishing Tackle Boxes Custom Wood Fishing Tackle Boxes
Custom Wood Fishing Tackle Boxes Wooden Tackle Box Plans Free Download free box woodworking ...
Wooden Tackle Box Plans Free Download free box woodworking ... Bakes : Chapter Free wooden tackle box plans
Bakes : Chapter Free wooden tackle box plans

Wooden Tackle Box Plans Free Download free box woodworking ...

Vintage wooden tackle box : 6 steps ( pictures, Vintage wooden tackle box: fellow instructablers; fanatical devoted fisherman, decided needed personalized tackle box. spending enormous time online perfect vintage style tackle box, empty. options, eit…. How wood tackle box pastimes, Examine collection lures items fishing estimate size tackle box design. draw dimensions piece paper, making box rectangular shape. typical box 7 inches high, 9 inches wide 12 inches long.. How wooden tackle box - 22 - youtube, How wooden tackle box. heres good project practice woodworking joinery techniques. simple complex .


Share:

Book of woodworking patterns


Woodworkers Pattern Book Fret Saw Pattern Books
Woodworkers Pattern Book Fret Saw Pattern Books Woodworker's Pattern Book Scroll saw, Woodworking ...
Woodworker's Pattern Book Scroll saw, Woodworking ... Download Scroll Saw Pattern Book Pdf Plans DIY Woodworking ...
Download Scroll Saw Pattern Book Pdf Plans DIY Woodworking ... Big Book Of Scroll Saw Woodworking Hobbies
Big Book Of Scroll Saw Woodworking Hobbies

Download Scroll Saw Pattern Book Pdf Plans DIY Woodworking ...

Woodworking books craftsmanspace, Woodworking books extend knowledge acquired workshop, find advices proper examples master woodworking techniques. good woodworker collection woodworking books, learned skills helped learn large number woodworking. Best books woodworkers - woodworking plans & tools, Worth hunt: woodworking: technique, bob moran (1996). gem starts wink ’ explained cover: “ practical ways job— choose ’ .”bob introduces main woodworking processes dimensioning stock, cutting dovetails, offers variety ways job . Amazon.: wood burning pattern books, 1-48 771 results "wood burning pattern books" woodburning realistic animals: 12 step--step pyrography projects birds, pets, wildlife (fox chapel publishing) tutorials eyes, fur, manes, & whiskers; projects big cats, owls, & . minisa robinson..


Share:

Postingan Populer

Search This Blog

Powered by Blogger.

Entri yang Diunggulkan

Building Durable Wooden Picture Frames for Large Artwork

Building Durable Wooden Picture Frames for Large Artwork Creating a picture frame for a large piece of artwork presents unique challenges....

Recent Posts

Theme Support